
To install an integrated spa spillover, start by planning your layout and gathering the right tools and materials, such as a spillover grille, sealant, and plumbing fittings. Carefully position and secure the spillover, making sure it’s level and sealed properly. Connect the plumbing to manage water flow, then test for leaks and proper operation. Finish with aesthetic touches like lighting or decorative materials. Keep in mind, attention to detail ensures a seamless, durable spillover—you’re about to learn more on how to do it right.
Key Takeaways
- Evaluate the spa and surrounding area for proper placement, drainage, and compliance with safety codes before installation.
- Gather compatible spillover components, mounting hardware, and tools, ensuring proper fit and waterproof seals.
- Position and secure the spillover grille or feature, sealing joints with waterproof, spa-safe sealant for a tight fit.
- Connect plumbing carefully, test water flow, and adjust valves to ensure even spillover and leak-free operation.
- Enhance aesthetics with lighting and decorative finishes, and perform regular maintenance for optimal performance.
Planning and Design Considerations
Before you begin installing an integrated spa spillover, it is vital to carefully consider your planning and design. Start by evaluating your space and visualizing how the spillover will fit into your existing landscape or pool area. Think about the overall style you want to achieve—modern, natural, or luxurious—and choose materials and finishes accordingly. Measure your pool area precisely to guarantee proper placement and avoid future issues. Consider water flow and circulation to prevent splashing or uneven distribution. Planning for adequate drainage and access points is essential for maintenance. Also, review local building codes and safety regulations to ensure compliance. A well-thought-out design will streamline installation and enhance the aesthetic appeal of your spa spillover. Understanding the mechanics of water circulation can help optimize your spa’s performance and longevity. Incorporating natural techniques for efficient water management can contribute to sustainable and cost-effective operation. Additionally, paying close attention to water quality throughout the process will help maintain a clean and healthy spa environment. Properly managing water filtration systems is also crucial to keep your spa water pristine and safe for use.
Gathering Necessary Tools and Materials
To guarantee a smooth installation of your integrated spa spillover, you need to gather all the necessary tools and materials first. Start by listing essential items to ensure you’re fully prepared. 1. Basic Hand Tools: Screwdrivers, pliers, and a wrench for assembly and adjustments. 2. Sealant and Adhesives: Waterproof silicone sealant to secure fittings and prevent leaks. 3. Installation Components: Spillover grille, fitting hardware, and piping needed to connect the spillover to your spa’s filtration system. Having these ready saves time and minimizes disruptions during installation. Proper planning and understanding the installation process can help prevent installation delays and ensure a seamless process. Double-check your spa’s specific requirements and manufacturer recommendations to ensure you have everything needed for a secure, leak-free setup. Being familiar with component compatibility can further streamline the installation and reduce potential issues. Proper planning can help prevent installation delays and ensure a seamless process. Additionally, understanding the contrast ratio of your projector can help you optimize your home cinema environment for better visual quality, especially in controlled lighting conditions. Preparedness makes the entire process more efficient and stress-free.
Preparing the Spa and Surrounding Area
Have you prepared the spa and surrounding area to guarantee a smooth spillover installation? First, clear the area of any debris, tools, or obstacles that might interfere. Ensure the spa is clean, especially around the edges where the spillover will connect. Check that the surface is level and sturdy enough to support the spillover feature. If necessary, lay down a solid base or reinforce the surrounding decking. Measure carefully to confirm the placement aligns with your planned spillover flow. Protect nearby surfaces from water splashes or damage during installation by covering them with tarps or plastic sheeting. Taking these steps ensures a seamless process and a professional-looking finish for your integrated spillover feature. Additionally, verify the support structure is capable of handling the weight and water flow to prevent future issues. Proper installation techniques are essential for maintaining the durability and safety of your setup. Being aware of angel number meanings can also help you stay positive and motivated throughout the project. Remember that trust issues in relationships highlight the importance of solid foundations, just as a stable base is crucial for your spa. Incorporating regular maintenance into your routine can help extend the lifespan of your spa and prevent costly repairs down the line.
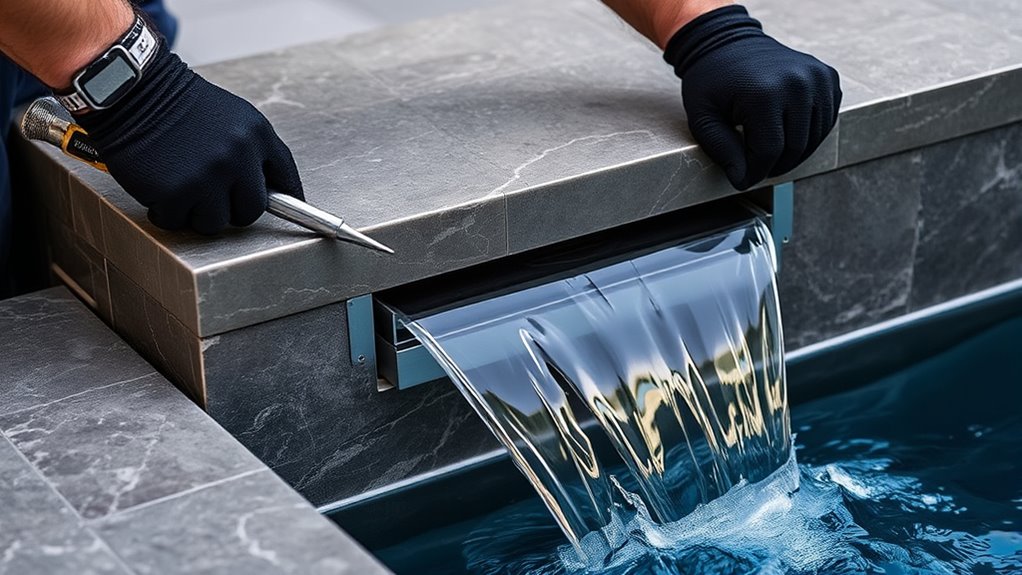
Installing the Spillover Feature

Once you’ve prepared the area, start installing the spillover feature by positioning it carefully in line with your measurements. Make certain it’s level and aligned with the spa edge for a seamless look. To secure the spillover correctly, follow these steps:
- Mark the placement points on the spa’s edge to guide your installation.
- Attach mounting brackets or supports as needed, using waterproof sealant to prevent leaks.
- Insert the spillover into position, pressing firmly to guarantee a tight fit and proper sealing.
- Ensure the installation process adheres to safety standards and manufacturer instructions for optimal functionality. Incorporating mindfulness techniques during installation can help you stay focused and precise, reducing errors.
Double-check that the spillover sits flush with the spa surface. Tighten any fasteners securely, and apply additional sealant if necessary. This ensures a stable, leak-free installation that will function smoothly. Incorporating proper tuning techniques can also enhance the overall performance and longevity of your spa system, and considering the performance metrics can help optimize your setup. Being aware of Louisiana alimony laws can also inform your planning to avoid legal issues related to post-installation support adjustments.
Connecting Plumbing and Water Flow Systems
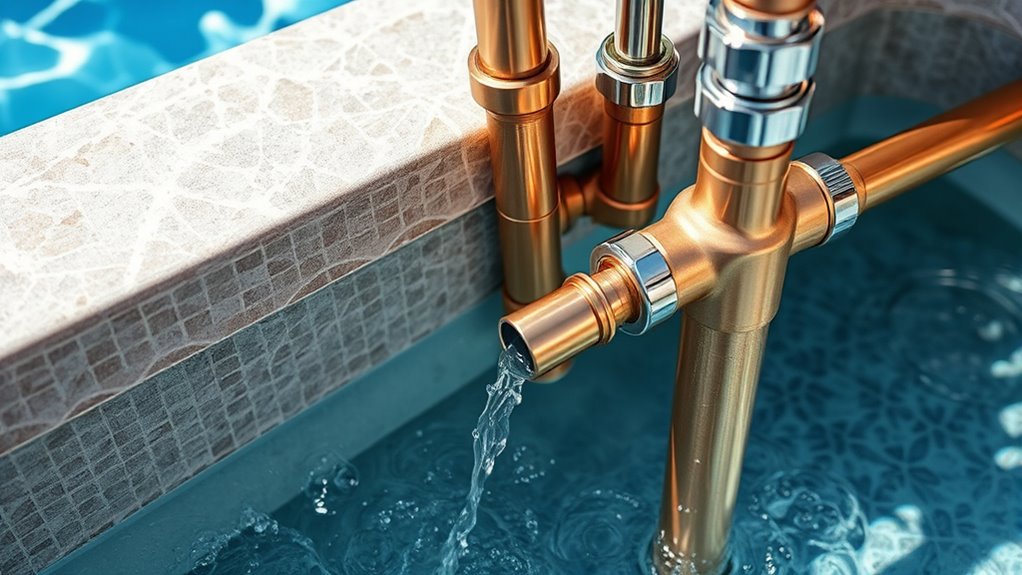
Connecting the plumbing and water flow systems is a crucial step to guarantee your spillover functions properly. First, ensure all connections are tight and leak-free to prevent water loss. Use appropriate fittings and pipes designed for spa systems, and double-check the flow direction before sealing. Properly align the spillover outlet with your spa’s water level to ensure a smooth overflow. Here’s a quick visual guide:
| Step | Action | Tools Needed |
|---|---|---|
| 1 | Measure and cut pipes | Pipe cutter |
| 2 | Connect pipes to spillover outlet | Wrenches, fittings |
| 3 | Secure connections with clamps | Clamps, screwdriver |
| 4 | Test water flow before sealing | Water supply |
| 5 | Adjust flow for even spillover | Valve adjustment |
This ensures your water flows seamlessly, avoiding future issues. Additionally, verifying proper water flow can help prevent potential malfunctions or water damage, and paying attention to system pressure is important for optimal operation. Ensuring correct water flow regulation is essential for maintaining the spillover’s efficiency and longevity. Incorporating regular system checks can also prolong the lifespan of your water flow components.
Securing the Spillover in Place
To securely hold your spillover in place, you’ll need to follow proper mounting techniques that guarantee stability. Reinforcement materials can help strengthen the attachment and prevent movement over time. Additionally, sealing carefully is essential to prevent leaks and protect your spa’s water integrity. The use of performance cookies can help monitor the effectiveness of your sealing and mounting efforts over time.
Proper Mounting Techniques
Securing the spillover properly is essential to guarantee it functions safely and effectively. To do this, follow these mounting techniques:
- Ensure the spillover aligns precisely with the spa edge, avoiding gaps that can cause leaks.
- Use appropriate mounting brackets or clamps designed for your spillover model, tightening them firmly but without over-tightening.
- Seal joints with a waterproof, spa-safe adhesive or sealant to prevent water seepage and maintain stability.
Double-check that all fasteners are secure and the spillover sits flush against the spa surface. Proper mounting not only prevents leaks but also ensures the spillover remains stable during use. Take your time to verify each step for a safe, durable installation.
Use of Reinforcement Materials
Reinforcement materials play a crucial role in guaranteeing the spillover stays firmly in place, especially in high-traffic or outdoor environments. You should select durable materials like stainless steel brackets, heavy-duty adhesives, or reinforced concrete to strengthen the installation. These materials help resist shifting, cracking, and damage caused by weather or frequent use. When attaching the spillover, ensure you embed reinforcement bars or mesh within the supporting structure to provide added stability. Proper reinforcement not only secures the spillover but also prolongs its lifespan. Be sure to follow manufacturer recommendations for specific reinforcement products and installation techniques. This step is critical to prevent future issues and maintain a seamless, secure fit for your integrated spa spillover.
Ensuring Leak Prevention
Ensuring leak prevention begins with carefully securing the spillover to prevent water from escaping its designated area. You need to guarantee a tight seal between the spillover and the surrounding structure. To do this effectively:
- Apply a high-quality, waterproof sealant along all edges and joints.
- Use clamps or brackets to hold the spillover firmly in place during the curing process.
- Double-check all fittings and connections for tightness before filling the spa.
Taking these steps helps prevent leaks and water damage down the line. Regularly inspect the sealant and fittings, especially after initial installation, to catch any signs of failure early. Properly securing the spillover ensures a leak-free, seamless integration into your spa setup.
Testing for Leaks and Proper Operation
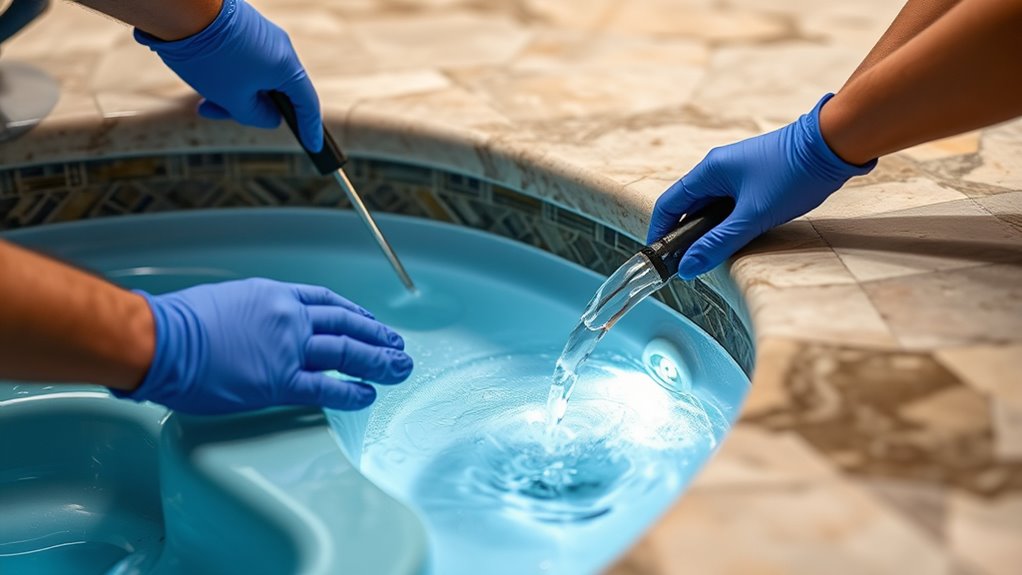
Once you’ve installed the spillover, turn on the system and carefully inspect for any water leaks around fittings and seams. Make sure the water flows smoothly through the spillover and into the spa without any blockages or uneven levels. Confirm that everything is watertight and operating correctly before proceeding.
Inspect Water Tightness
Before filling your spa, it’s essential to thoroughly test for leaks and verify everything operates correctly. To do this effectively:
- Visually inspect all connections, seals, and fittings for signs of moisture or damage.
- Fill the spa with water and monitor pressure levels, checking for any unexpected drops.
- Turn on the system and observe for leaks around jets, pipes, and the spillover area.
If you notice any dripping, wet spots, or pressure drops, address these issues immediately before proceeding. Confirm that all components are secure and functioning smoothly. This step helps prevent future problems and guarantees the spillover operates seamlessly once the water is in. Proper water tightness testing ensures a reliable, leak-free setup.
Verify Water Flow
Start by turning on your spa’s pump and circulation system to observe how water flows through the jets and spillover. Watch closely for any irregularities, such as inconsistent flow or sudden drops in water level, which could indicate leaks. Make certain that water is circulating smoothly without splashing or noise. Check that the spillover feature operates correctly, guiding water seamlessly into the spillway without overflow or turbulence. Confirm that all valves are open and functioning properly. If you notice weak jets or uneven water levels, turn off the system and inspect for blockages or leaks. Proper water flow confirms the system’s integrity and readiness for full operation, ensuring your spa functions efficiently and safely.
Finishing Touches and Aesthetic Enhancements
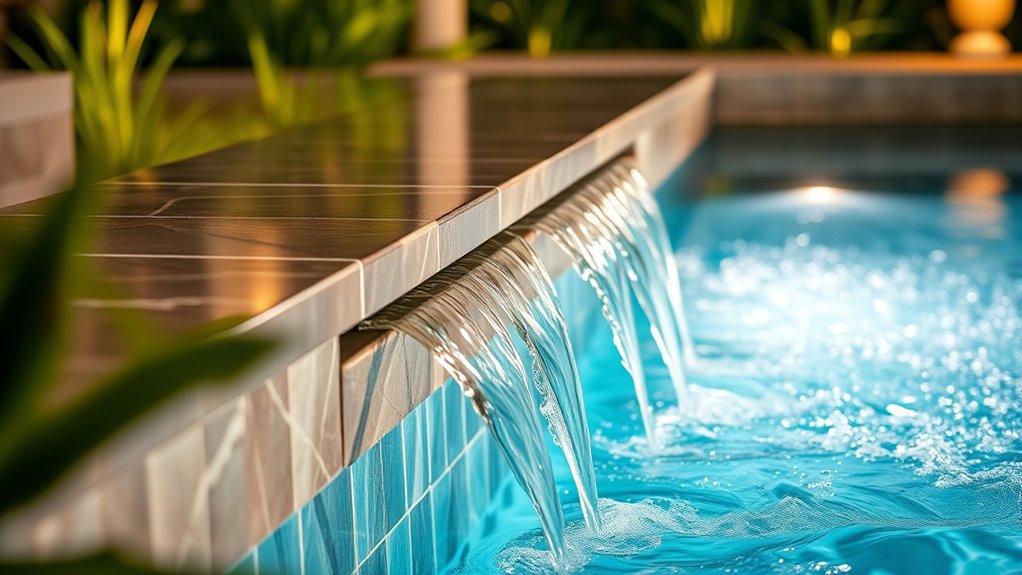
After installing the spa spillover, it’s time to focus on finishing touches and aesthetic enhancements that will elevate the overall look and feel. First, consider adding lighting features, such as LED accent lights, to create ambiance and highlight your spa’s design. Second, select complementary materials like stone veneer or decorative tiles around the spillover area to enhance visual appeal. Third, incorporate landscaping elements, such as lush plants or outdoor furniture, to create a inviting atmosphere. These touches not only improve aesthetics but also personalize your spa space, making it more welcoming. Taking these steps ensures your spillover installation blends seamlessly with your outdoor environment and reflects your unique style.
Maintenance and Troubleshooting Tips
Maintaining your spa spillover is essential to guarantee it functions smoothly and looks its best over time. Regularly check the water level and top it off as needed to prevent pump damage. Clean the spillover’s surface and surrounding area to prevent buildup of dirt and algae. Inspect the plumbing connections for leaks or blockages and tighten fittings if necessary. Test the water chemistry weekly, balancing pH, alkalinity, and sanitizer levels to avoid corrosion or cloudy water. If you notice uneven water flow or strange noises, turn off the pump and examine the pump and filter components. For persistent issues, consult your manufacturer’s troubleshooting guide or contact a professional. Proper maintenance ensures longevity, safe operation, and an attractive, relaxing spa experience.
Frequently Asked Questions
How Do I Select the Best Spillover Style for My Spa?
When choosing a spillover style, you should consider your spa’s design and your personal preferences. Think about how you want the water to flow and whether you prefer a subtle or more dramatic effect. Look at the available styles, such as integrated or raised spillovers, and match one to your spa’s shape and your outdoor aesthetic. Ultimately, select a spillover that enhances your spa experience and complements your space.
Can I Install the Spillover Feature Myself Without Professional Help?
Sure, why not turn into a DIY hero and install that spillover feature yourself? Just grab some tools, follow the instructions, and hope your neighbor’s pool doesn’t get jealous. But honestly, it’s not as simple as it looks—water, electrical wiring, and precise fittings are involved. Unless you’re a seasoned handyman, you might end up with a leak or a shock. Better call in a pro for peace of mind!
What Safety Precautions Should I Consider During Installation?
When installing a spillover feature, you should prioritize safety. Always turn off the power supply before starting, and wear protective gear like gloves and goggles. Make sure the area is dry to prevent slips, and follow the manufacturer’s instructions carefully. Avoid working alone, and double-check all connections for leaks or loose fittings. If you’re unsure, it’s best to consult a professional to guarantee a safe, proper installation.
How Do I Ensure Even Water Distribution Across the Spillover?
Perfectly planning water flow prevents pooling problems. You should start by checking the spillway’s slope to ensure it directs water smoothly. Next, uniformly install the spillover edge to prevent uneven distribution. Regularly adjust the water level to keep the flow consistent. Test the system by running the spa and observing the water’s spread. Fine-tuning these steps guarantees gracefully gliding, evenly distributed water, creating a seamless, soothing spillover experience.
Are There Specific Spa Models Compatible With Spillover Installations?
When selecting a spa model compatible with spillover installations, you should check the manufacturer’s specifications to guarantee the design supports spillover features. Look for spas with integrated or customizable spillover options, and verify their compatibility with your existing setup. You can also consult with suppliers or installers to find models specifically designed for spillover use. This way, you ensure smooth integration and ideal water distribution.
Conclusion
Once you’ve installed your spillover, you’ll notice how seamlessly it enhances your spa’s look and feel. As you enjoy a relaxing soak, it’s a pleasant coincidence that the gentle water flow keeps your spa cleaner and more inviting. With proper maintenance, this feature becomes a simple pleasure, turning your backyard into a serene retreat. So, take a moment to appreciate how your careful work now creates countless relaxing experiences, all thanks to your successful installation.