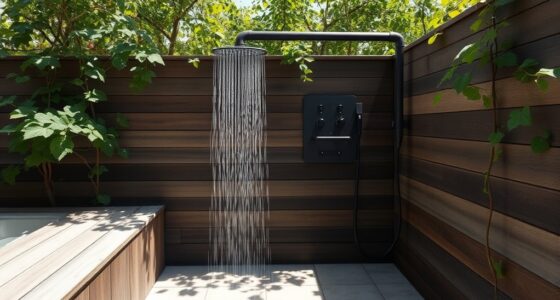

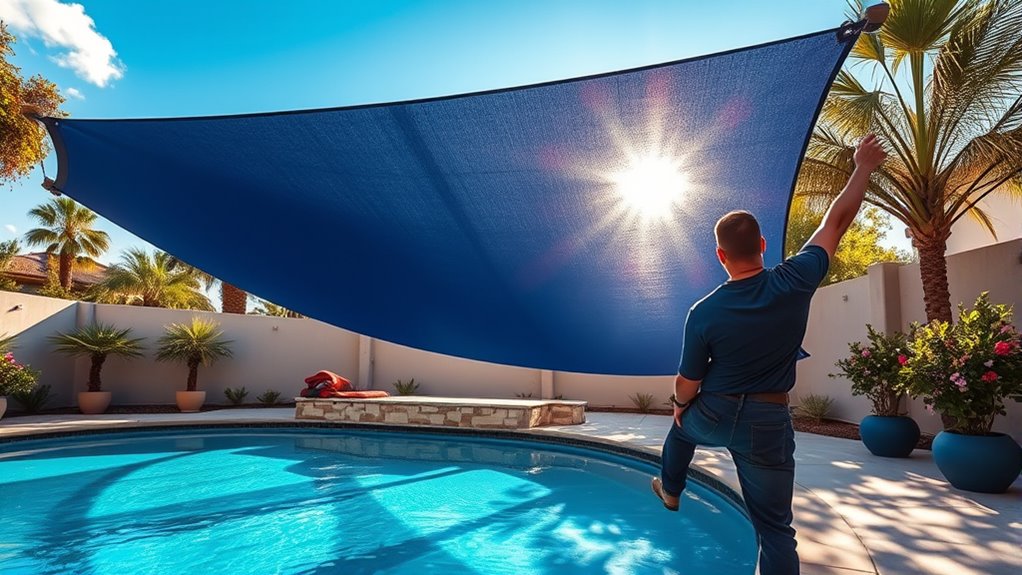
To install a DIY shade sail over your pool deck, start by measuring the area and marking sturdy anchor points, like walls, posts, or trees, guaranteeing they’re high enough for proper tension. Choose weather-resistant hardware and durable, UV-stabilized fabric for long-lasting protection. Secure the anchors, attach the sail using appropriate fittings, and adjust tension evenly for a smooth, stable shade. Keep advancing through these steps to ensure a safe and effective setup.
Key Takeaways
- Measure your pool deck area accurately and plan anchor points to ensure proper shade coverage and stability.
- Select durable, UV-stabilized materials and rust-resistant hardware suitable for outdoor and poolside conditions.
- Identify sturdy, high anchor points like walls, posts, or trees, ensuring they can withstand tension and weather.
- Mark precise locations for anchors using levels and measuring tools, double-checking for proper height and alignment.
- Tension the shade sail evenly with turnbuckles, perform final safety checks, and secure all hardware before use.
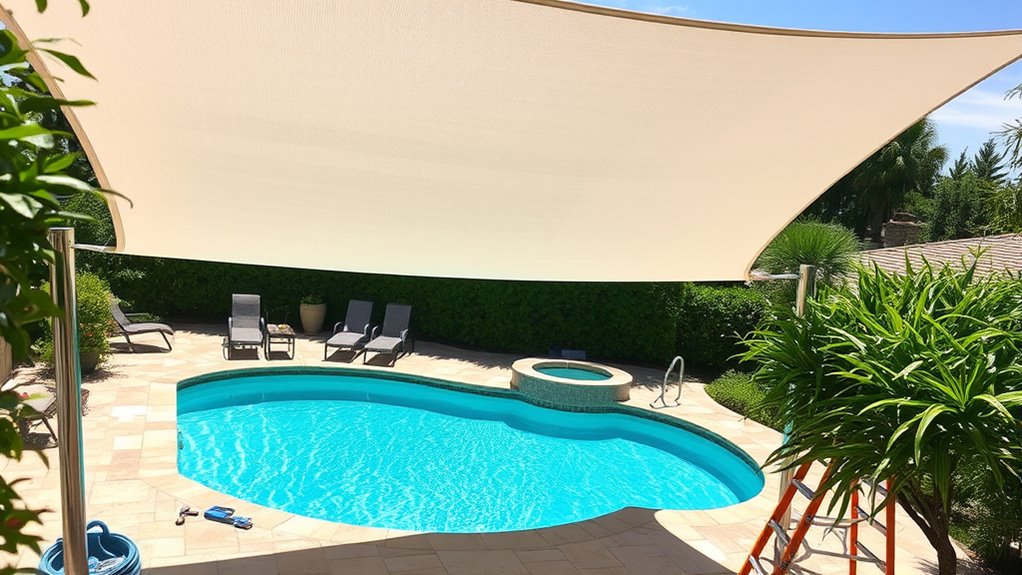
Planning Your Shade Sail Project
Before you begin installing your shade sail, make sure to plan carefully to guarantee a successful project. Start by measuring the area you want to shade, noting the dimensions and any obstructions. Decide on the best location for attachment points, ensuring they’re sturdy and secure. Consider the direction of the sun throughout the day to maximize shade coverage. Think about the height at which you’ll install the sail—too low and it might interfere with movement, too high and it could be less effective. Sketch a simple diagram to visualize how the shade will look and function. Planning ahead helps you determine the right materials and tools you’ll need, saving time and preventing surprises during installation. Proper planning sets the foundation for a smooth, effective project. Additionally, understanding the horsepower of electric motors can help you select the right equipment if you plan to include motorized components in your project. Knowing the air quality in your area can also influence your choice of materials, especially if you’re concerned about pollutants or allergens affecting your outdoor space. It’s also beneficial to research Glycolic Acid Benefits for Skin if you plan to incorporate skincare routines into your outdoor area for added comfort. Being aware of air purifier options and their features can help create a more comfortable outdoor environment by reducing airborne pollutants. Considering AI cybersecurity skills can be advantageous if you intend to integrate smart technology or security systems into your outdoor setup.
Choosing the Right Shade Sail and Materials
Selecting the right shade sail and materials is essential to guarantee durability, effectiveness, and aesthetic appeal. You want a fabric that withstands sun, wind, and moisture without fading or tearing. Consider UV-stabilized HDPE or polyester for longevity, and choose colors that complement your pool area. The mounting hardware should be rust-resistant and strong enough for your sail’s size and tension. Here’s a quick guide:
| Material | Durability | Cost |
|---|---|---|
| HDPE Fabric | UV resistant, breathable | Moderate |
| Polyester | Strong, quick-drying | Affordable |
| Vinyl | Heavy-duty, waterproof | Higher |
| Mesh | Light shade, ventilation | Budget |
| Canvas | Classic look, sturdy | Variable |
Pick materials based on climate, style, and budget for optimal results. Additionally, selecting materials with high tensile strength ensures your shade sail can withstand strong winds and heavy use over time. Proper installation techniques, including secure anchoring and appropriate tensioning, are crucial for preventing damage and maintaining the sail’s effectiveness.
Measuring and Marking the Installation Area
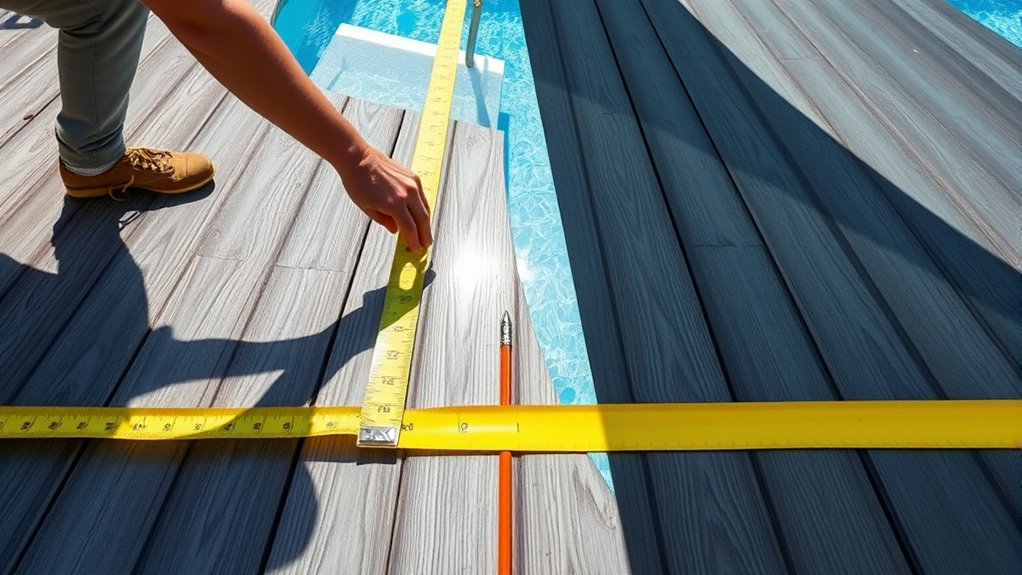
Start by measuring the exact dimensions of your installation area to guarantee your shade sail fits properly. Use a tape measure and level to mark the precise locations for your anchor points. Accurate measurements and clear marks will make installation smoother and more secure. Incorporating digital literacy skills into your planning can also help you access helpful online tutorials and resources for a successful setup. Utilizing precision measurement techniques ensures your markings are accurate, reducing the risk of errors during installation. Practicing measurement accuracy can further enhance the reliability of your markings, making sure your shade sail is properly supported. Additionally, understanding market volatility can help you time your purchase of materials or accessories more effectively. Being aware of weather patterns can also assist in planning the installation to avoid adverse conditions.
Measuring Precise Dimensions
Accurately measuring and marking the installation area is essential to guarantee your shade sail fits perfectly and provides maximum coverage. Use a measuring tape to determine the distances between anchor points, ensuring they are level and square. Double-check your measurements before marking. Precision here prevents sagging, gaps, or misalignment later. To clarify, compare the distances with your shade sail dimensions to confirm fit. Consider adjusting for tension and slack. Here’s a quick reference:
| Anchor Point | Measurement (ft) | Notes |
|---|---|---|
| Front Left | 10 | Keep level with others |
| Front Right | 10 | Ensure same height |
| Back Center | 14 | Centered for coverage |
Double-check measurements before proceeding to marking. Additionally, understanding construction activities helps ensure your installation is secure and durable. Proper preparation and accurate measurements are critical for shade sail longevity and effectiveness. Recognizing the importance of attention in creative practice can also lead to more precise and successful installations, especially when working with complex layouts and materials. Paying close attention to measurement accuracy minimizes errors and enhances overall project quality.
Marking Anchor Points
Have you double-checked your measurements? Accurate marking of anchor points is essential for a secure and even shade sail installation. Begin by locating the points where you’ll attach the sail, considering the height and tension needed. Use a tape measure to measure distances from fixed reference points, like walls or posts, ensuring consistency. Mark each anchor point clearly with a pencil or chalk, making sure they’re level and aligned. Double-check your markings before drilling or installing hardware. Precise marking prevents sagging, uneven tension, or attachment issues later on. Take your time to verify each measurement and marking, as this step lays the foundation for a successful, long-lasting shade sail setup over your pool deck. Additionally, understanding automation technology can help streamline your project planning and measurement processes. Incorporating accurate measurement techniques can further enhance the installation precision of your setup. To ensure your markings stay accurate over time, consider using laser levels for more consistent results. Employing proper tools is also crucial to achieve the most reliable and precise measurements for your project.
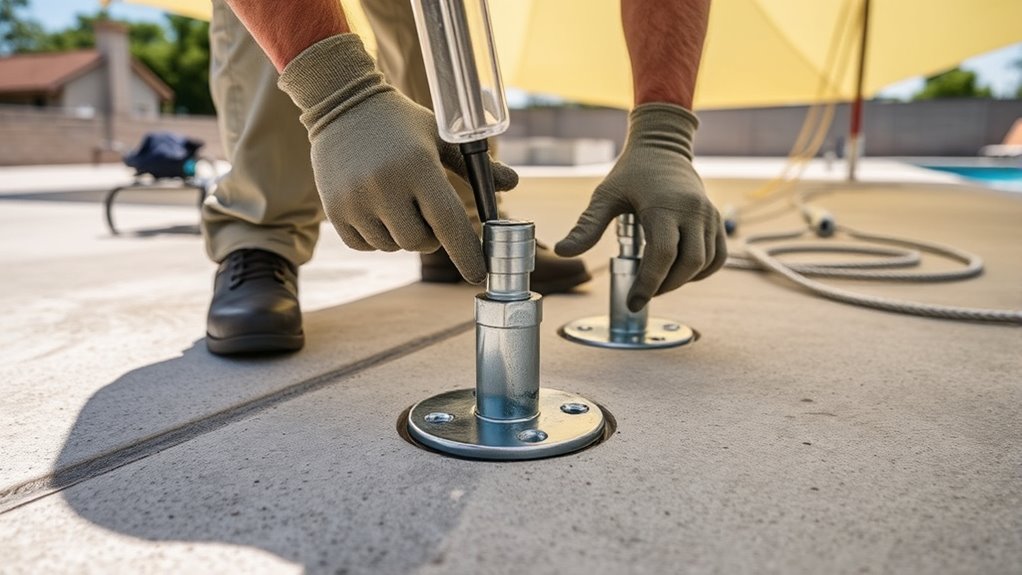
Selecting Anchor Points and Hardware
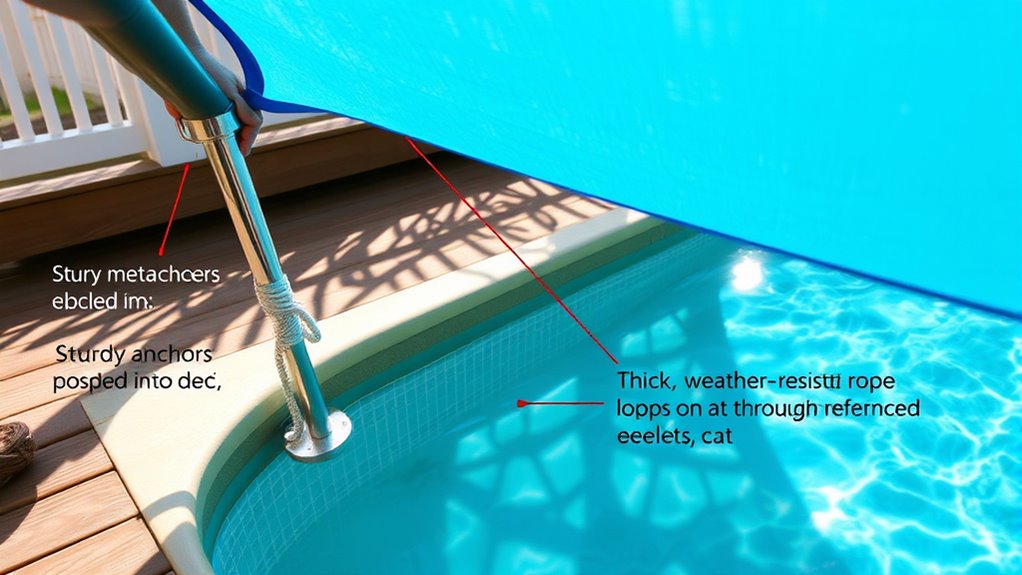
Choosing the right anchor points and hardware is essential for a secure and durable shade sail installation. You want your setup to withstand wind and weather without sagging or failing. First, identify sturdy anchor points, such as existing wall mounts or robust posts. Second, select hardware rated for outdoor use, like galvanized or stainless steel fittings. Third, guarantee the hardware matches the tension needed for your sail, whether eye bolts, turnbuckles, or shackles. Properly positioned anchor points should be high enough to create a gentle slope, promoting water runoff and tension. Avoid weak or unstable surfaces, as they can compromise the entire structure. Additionally, considering proper hardware selection ensures the longevity and safety of your installation. Using hardware with appropriate corrosion resistance is particularly important in outdoor settings exposed to moisture. By choosing quality hardware and strategic anchor points, you’ll ensure your shade sail stays secure and looks great for years to come.
Preparing the Site for Installation
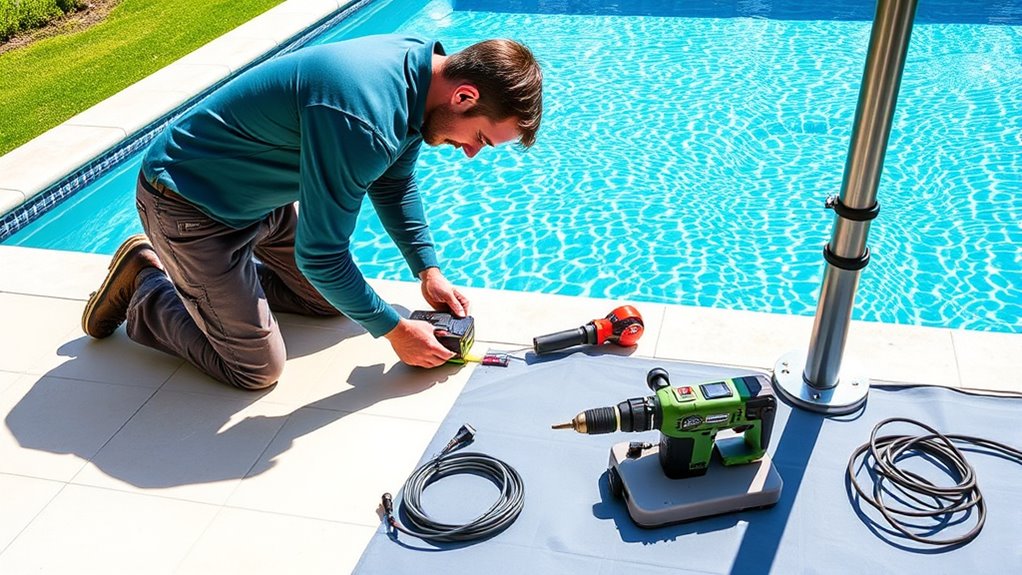
Before installing your shade sail, preparing the site guarantees a secure and long-lasting setup. Start by clearing the area of any debris, leaves, or obstructions that could interfere with the installation. Check the surface for stability—whether it’s concrete, wood, or another material—making sure it can support the tension and weight of the sail. Measure the space accurately to determine the proper size and shape of your shade. Mark the locations where the anchor points will go, making sure they’re at the correct height and angle for ideal shade coverage. Inspect for any underground utilities or hidden hazards. Properly preparing your site minimizes unexpected issues during installation and ensures your shade sail remains secure and effective over time.
Installing the Anchor Points
To guarantee your shade sail stays secure, choose strong, stable locations for the anchor points. Make sure these spots can handle the tension and weight of the sail over time. Use the right anchors for your surface to prevent any slipping or failure.
Selecting Secure Locations
Selecting secure locations for your anchor points is crucial to guarantee your shade sail stays stable and safe. You need strong, reliable spots that can handle tension and weather conditions. First, look for sturdy structures like trees, posts, or walls that are firmly rooted. Second, ensure the chosen points are high enough to create proper tension and prevent sagging—ideally, at least 7-9 feet above the deck. Third, avoid areas with sharp edges or potential obstructions that could damage the sail or interfere with installation. By choosing locations that meet these criteria, you’ll set a solid foundation for your shade sail, reducing the risk of accidents and ensuring it remains taut and secure over time.
Using Proper Anchors
Installing the right anchors is essential to guarantee your shade sail remains secure and stable. Choose anchors that match your surface type—concrete, wood, or soil—and ensure they can handle the tension. Use heavy-duty eye bolts or anchors designed for outdoor use. Proper installation involves drilling or embedding anchors deep enough to withstand wind and weight.
| Anchor Type | Suitable Surface |
|---|---|
| Eye bolts | Concrete, wood |
| Ground anchors | Soil, soft ground |
| Toggle bolts | Hollow walls, decks |
| Sleeve anchors | Solid masonry |
Selecting the correct anchors prevents failure and prolongs your shade sail’s lifespan. Always verify weight ratings and follow manufacturer instructions for the best results.
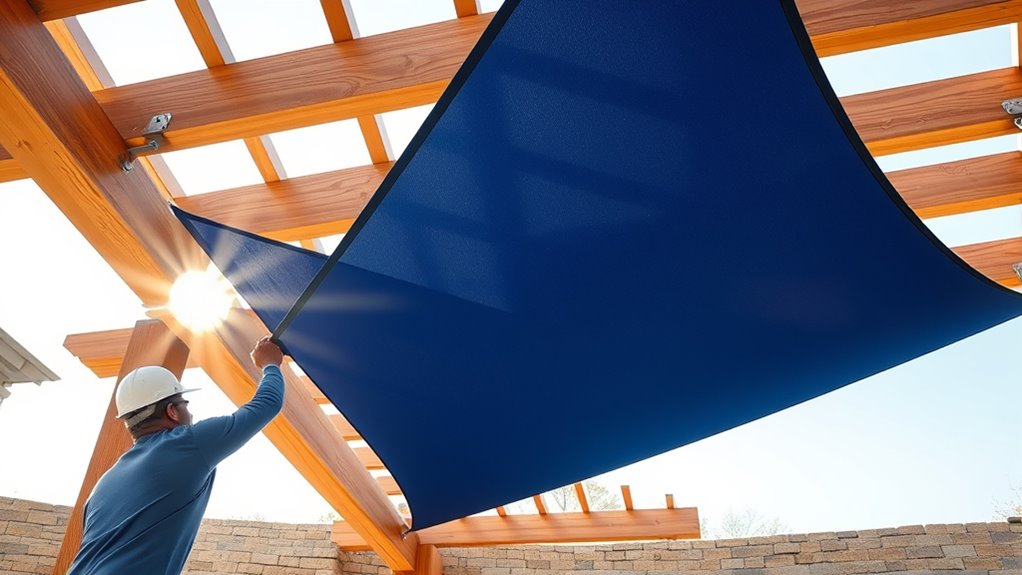
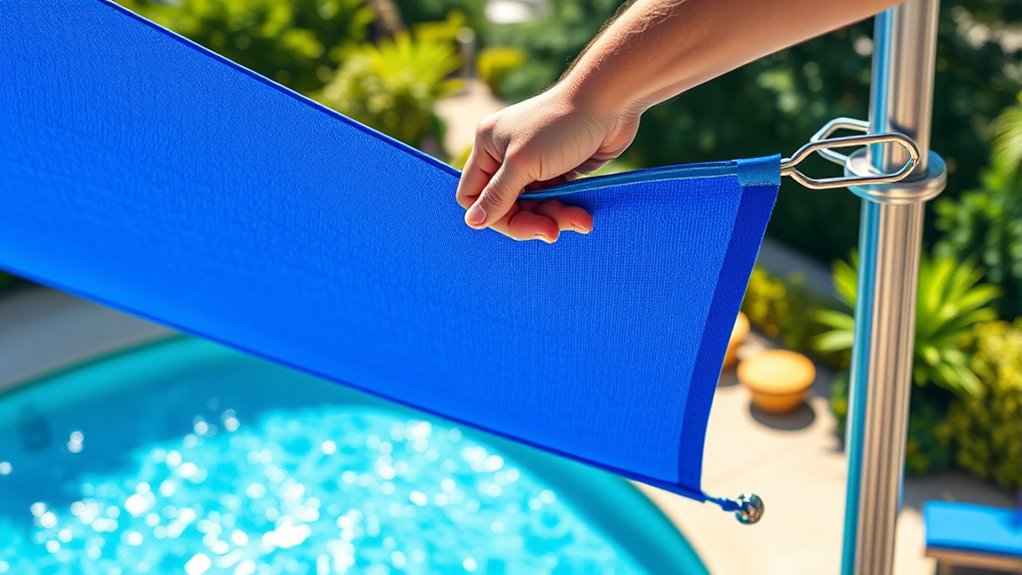
Attaching the Shade Sail to the Anchors
Attaching the shade sail to the anchors is a critical step that guarantees your shade stays securely in place. First, ensure the sail’s corner grommets align with your anchor points. Next, choose the right hardware—such as stainless steel turnbuckles, D-rings, or snap hooks—to connect the sail to the anchors. Finally, follow these steps:
- Loop the hardware through the grommet and secure it tightly.
- Attach the hardware to the anchor bolts or hooks firmly.
- Double-check all connections for stability and security before proceeding.
This process keeps your shade sail stable and prevents sagging or detachment during windy conditions. Proper attachment guarantees your pool deck remains shaded and cozy for years to come.
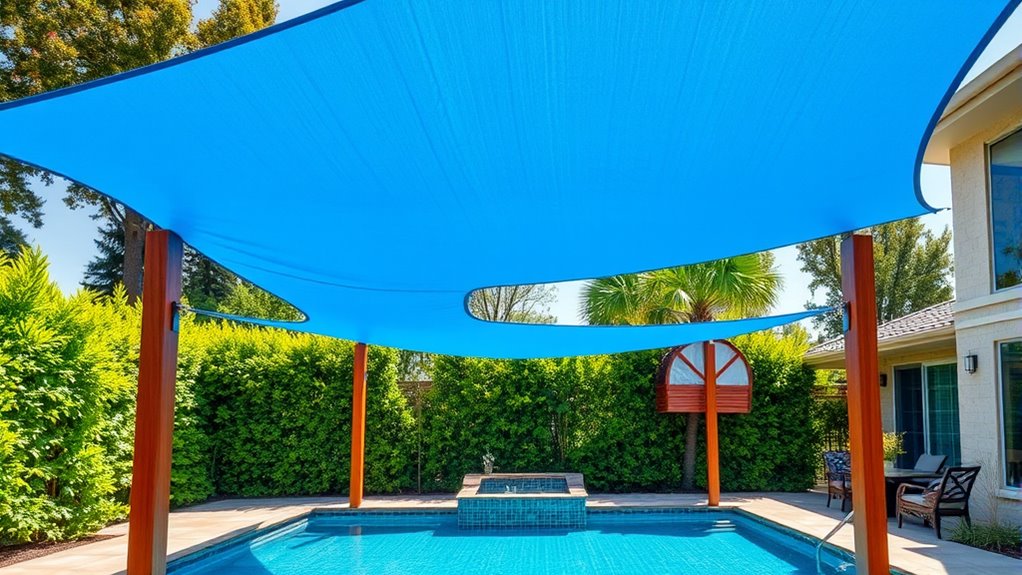
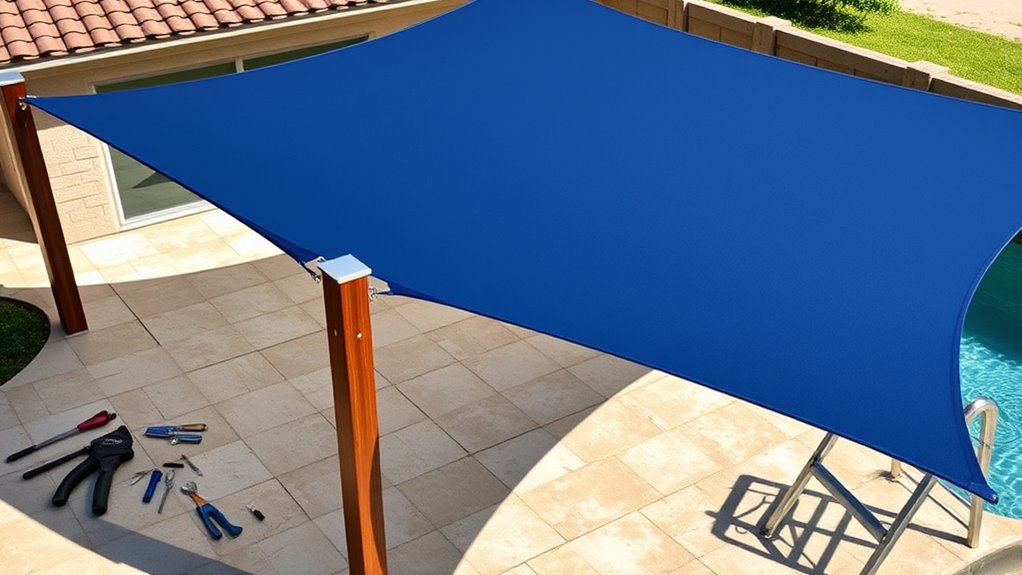
Adjusting Tension and Securing the Sail
Once your shade sail is securely attached, the next crucial step is to adjust the tension to guarantee a smooth, taut surface. To do this, use a tensioning tool or turnbuckles to tighten the anchor points evenly. Check for sagging or wrinkles and incrementally tighten each corner until the sail is firm. Be careful not to over-tighten, as this could damage the fabric or hardware. Use the following guide to help balance tension:
| Corner | Adjustment Method | Tension Goal |
|---|---|---|
| A | Turnbuckle clockwise | Slight pull, no sagging |
| B | Check for wrinkles | Smooth, even surface |
| C | Adjust gradually | Tight but not overstressed |
| D | Confirm tension | Consistent across all corners |
Proper tension ensures durability and a clean look.
Final Inspection and Maintenance Tips
Before wrapping up your installation, it’s essential to perform a thorough final inspection to guarantee everything is secure and functioning properly. Check the tension of the sail to ensure it’s not too slack or overly tight. Inspect all attachment points and hardware for signs of wear, rust, or damage. Confirm that the sail is evenly stretched and properly anchored.
Here are some maintenance tips to keep your shade sail in top shape:
- Regularly clean the fabric with mild soap and water to prevent mold and dirt buildup.
- Inspect the hardware monthly for rust or corrosion and replace if needed.
- Trim any loose or frayed edges promptly to prevent further damage.
Following these steps helps prolong the lifespan of your shade sail and maintains its effectiveness.
Frequently Asked Questions
How Long Does a Typical Shade Sail Installation Last?
A typical shade sail installation usually lasts between 5 to 10 years, depending on factors like material quality, weather conditions, and maintenance. You’ll want to regularly inspect the sail for tears, loose fittings, or fading. Proper installation and routine upkeep can extend its lifespan. Choosing high-quality fabrics and sturdy hardware helps guarantee your shade sail stays durable and provides reliable sun protection for years to come.
Can I Install a Shade Sail on Uneven or Sloped Surfaces?
Sure, installing a shade sail on uneven or sloped surfaces sounds like a breeze—until you realize it’s almost like trying to hang a hammock on a roller coaster. You can definitely do it, but you’ll need special hardware, extra planning, and patience. Think of it as a fun challenge rather than a simple task. Just measure carefully, choose the right anchors, and you’ll create a stylish, effective shade that stays put.
What Are the Safety Precautions During Installation?
When installing a shade sail, safety is key. You should always wear gloves, safety goggles, and sturdy footwear to protect yourself. Make sure the area is clear of obstacles and bystanders. Use proper tools and follow the manufacturer’s instructions carefully. Avoid working at heights alone, and verify your ladder or scaffolding is stable. Double-check all fittings and tension points before finalizing to prevent accidents or damage.
How Do Weather Conditions Affect the Shade Sail’S Durability?
Think of weather as the silent sculptor shaping your shade sail’s fate. Harsh sun, heavy rain, or strong winds can weaken the fabric and hardware over time, reducing its lifespan. High UV exposure causes fading and material degradation, while storms can tear or loosen fittings. To keep your shade sail durable, regularly check and maintain it, and consider weather-resistant materials designed to withstand your local climate’s challenges.
Is Professional Help Necessary for Complex Installations?
When tackling complex shade sail installations, you might wonder if professional help is needed. If you’re not experienced with such projects, it’s wise to hire experts to guarantee safety, proper tension, and secure anchoring. Professionals have the tools and knowledge to handle tricky setups, preventing future issues. Relying on their expertise saves you time, effort, and potential costly mistakes, making the process smoother and more reliable.
Conclusion
Once you finish installing your shade sail, you’ll feel like a superhero with the power to transform your pool area into a shaded paradise in just hours. Every ripple and perfect tension will remind you that you’ve conquered a DIY masterpiece. Your deck will become the envy of the neighborhood, and you’ll wonder how you ever lounged without this epic shade solution. Get ready to relax in your own personal oasis, built by your own unstoppable hands!